Add Test Steps
The Steps dialog lets you add steps to your test plan. All available test steps from installed packages are displayed in expandable groups.
- Click the arrow next to a group to expand it.
- Click a step (1) to display a description near the bottom of the dialog box (2):
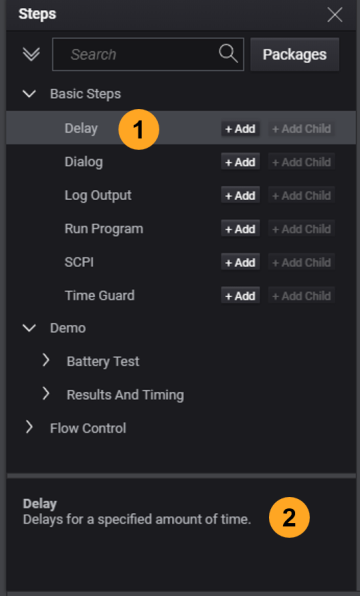
The selected step is identified by a blue bar:
To add a step to the test plan:
-
In the test plan, select the step that you want to precede the new step. New steps are added after the selected step(s).
-
In the Steps dialog, locate the step you want to add. If you know the step name (or part of the name), enter it in the Search field to find it (press Esc to clear the search).

-
Add the desired test step using one of the following methods:
- Select the test step and click the Add button
- Double-click the test step
- Drag the test step from the dialog box to the Test Plan pane
-
Close the dialog.
- To save the test plan to the PathWave Desktop Edition internal file system, see Save a Test Plan.
To save the current test plan to a specific file location on your computer, type Ctrl+S, navigate to the desired location, and enter a file name with a .TapPlan extension.