Set Up X8721A in Access Point Mode
This section covers the general procedure to set up the X8721A as a WLAN Access Point. In definition, a wireless access point is a networking device that allows other devices to connect to a wired network.
- Select the Wireless LAN - Access Point radio from the drop-down list as shown below. The software will begin to scan for surrounding devices. If applicable, you may now turn on and place your device in the shield box. Ensure that your device(s) are well shielded.

-
Follow the steps below to set up the X8721A as a Station. The associated controls are as described at Wireless LAN Access Point and Station. In general, you must configure the following:
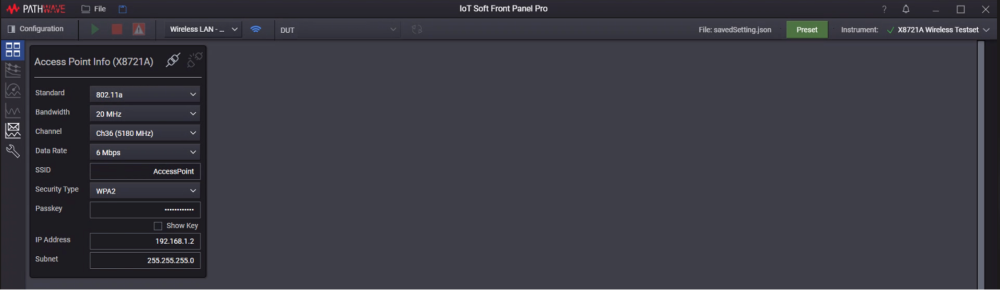
- Select any one of the WLAN Standard to display the corresponding Bandwidth, Channel, and Data Rate options in the drop-down list of each field.
- Enter the SSID of the Access Point. This will be the name of the network that advertises according to the standards set.
-
Set the desired Security Type and enter the password in the Passkey field.
 NOTE
NOTEYou can also expand the Configuration panel to view and modify other settings to suit your testing requirement. The settings are as described in Wireless LAN Test Setup Configuration
-
Click the Start Access Point (
 ) icon to start running the X8721A as an Access Point. On the DUT, you should now see the SSID of X8721A in the list of available network. The DUT (acting as Station) will need to initiate a connection to the X8721A.
 -
Upon successful connection, click Rescan DUT (
 ) to retrieve the Device Information. Once you have selected a DUT in the Device Selection button, the software will retrieve and display the information as shown below.
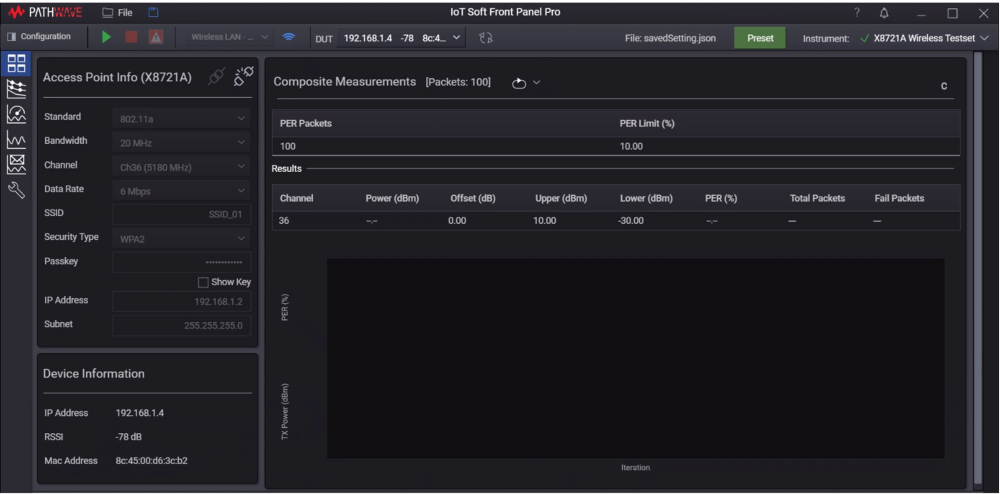
Next
For those who are performing Throughput measurement in Access Point mode, go to Perform WLAN Throughput Measurement. Otherwise, proceed to Run the Measurement and View Results.